
There is nothing more exciting than hearing a customer say, “do whatever you want” in my little cake world. It gives me an ever so slight feeling of power, followed by the ever so slight feeling of terror that I will let them down.
No matter……I always think ‘fine….I will’ and press on to do the first thing that comes to mind, even if I’m Ascared to do it.
About 5 or 6 years ago, when cake shows were big on tv, I saw an episode where The Cakegirls made a bobble head cake, and I was absolutely blown away! So when I decided that I needed to try this some years later, I just figured I could jump online and there would be a diagram and instructions…….Errrrrr……no such luck. Dag gummit! I searched and searched and finally accepted that I was going to have to dig into the archives of me lil brain and pull out whatever remained of what I had thought they did.
I was already down to crunch time when I decided this was happening, so I scribbled down the following drawing and sent it off to my extremely skilled carpenter husband at work, with the following request, “Baby, I think this is what I need, please make it happen…uhhh today?”(heart…heart….smiley….kissie face)

His first response was Ofcourse, “um….lead pipe in a cake? Lmao”. Ok ok…….so maybe I didn’t fully think that through, and had that coming but he knew what I was going for and seemed to agree that this might be the right direction. Woot! Unfortunately, and typically he was held at work for the rest of the evening so I was on my own…..wha wha wha. Good thing I’m a handy chick….and usually I’m of the opinion that there’s nothing better than cake, except when you need a power tool or two to build the base the cake is going on…..fun stuff!
Here’s what you need: (well…..most of it is pictured)

- A sturdy cake base (I found this precut 18″ pine wood circle at The Home Depot)
- Large block of craft foam (approx 1 1/2″ thick….the rest depends on what size cake you’re making)
- 8- Washers & lots of assorted screws
- 2 wooden blocks (Mine were 4.5″ squares x 3/4″ thick)
- 4 heavy duty compression springs
- Threaded 1/2″ pipe (not lead…haha……although I did cover mine in Saran Wrap anyways to make myself feel better) length depends on your cake size
- Heavy duty Velcro
- 1/2″ flange (I used 4, the hubs assures me I did it wrong and he wouldve built a base that only required 2……either way, this worked just fine)
- I also used heavy duty poster board for the helmet base, and a piece of 1/4″ thick craft wood, cut to size for my cake and stacked , as a base for the “chest” of the bobble head figure,and lastly heavy duty foam core board, also cut to size for my cake plates(not pictured)
It’s really very simple……start with your circular cake base and attach your first flange, then thread in your shorter pipe for the “legs”

Next, attach your “unnecessary” second flange to your craft wood


Place your foam core cake board on top and then attach your third “unnecessary” flange and thread in your longer pipe fitting

Now it’s time for “The Bobble Mechanism”. This part is a little tricky. I tried to do it on my own, with some very whimpy springs……it was not happening! I upgraded to much thicker, heavy duty springs and began attaching them to the first block.


Once all 4 were attached I realized quickly I couldn’t attach the second block alone. My handy hubby and I needed to do it together. Unfortunately, I have no pictures of that process because it was all hands on deck! One person to pry the top piece back, and the other to in set the screws and washers. After iThey were all in place I attached the 4th and final very very necessary flange to one side.
As you’ll see in the next pic, we originally assembled the springs toward the inside of the corners. Then we did a test bobble with a heavier plate since it was nearby. It seemed to work perfectly.
HOWEVER………Once we did a test bobble with the actual helmet portion of the cake, while awesome to witness, it proved too terrifying for us both so we reassembled the mechanism and positioned the springs directly under each corner.

It’s not so scary when you’re using a plate…..but I promise with a cake on top there were screams all around!

Ahhhhhh…..see, this is much better…..I recommend placing the springs as close to the corners as you can.
The whole process was actually very simple! I won’t go through the whole process of making this cake, since this tutorial is for the cake structure, but here are a few side tips I would’ve loved to have had myself beforehand.
I used rice cereal treats to carve the leg portion of the structure because we didn’t need it to all be cake, but you could easily use cake for them, and add more servings.


 Next….. If I had it to do again, I’d wait until I had an extra set of hands to cover the ginormous helmet! As a matter of fact, I’d probably make the head portion a bit smaller.
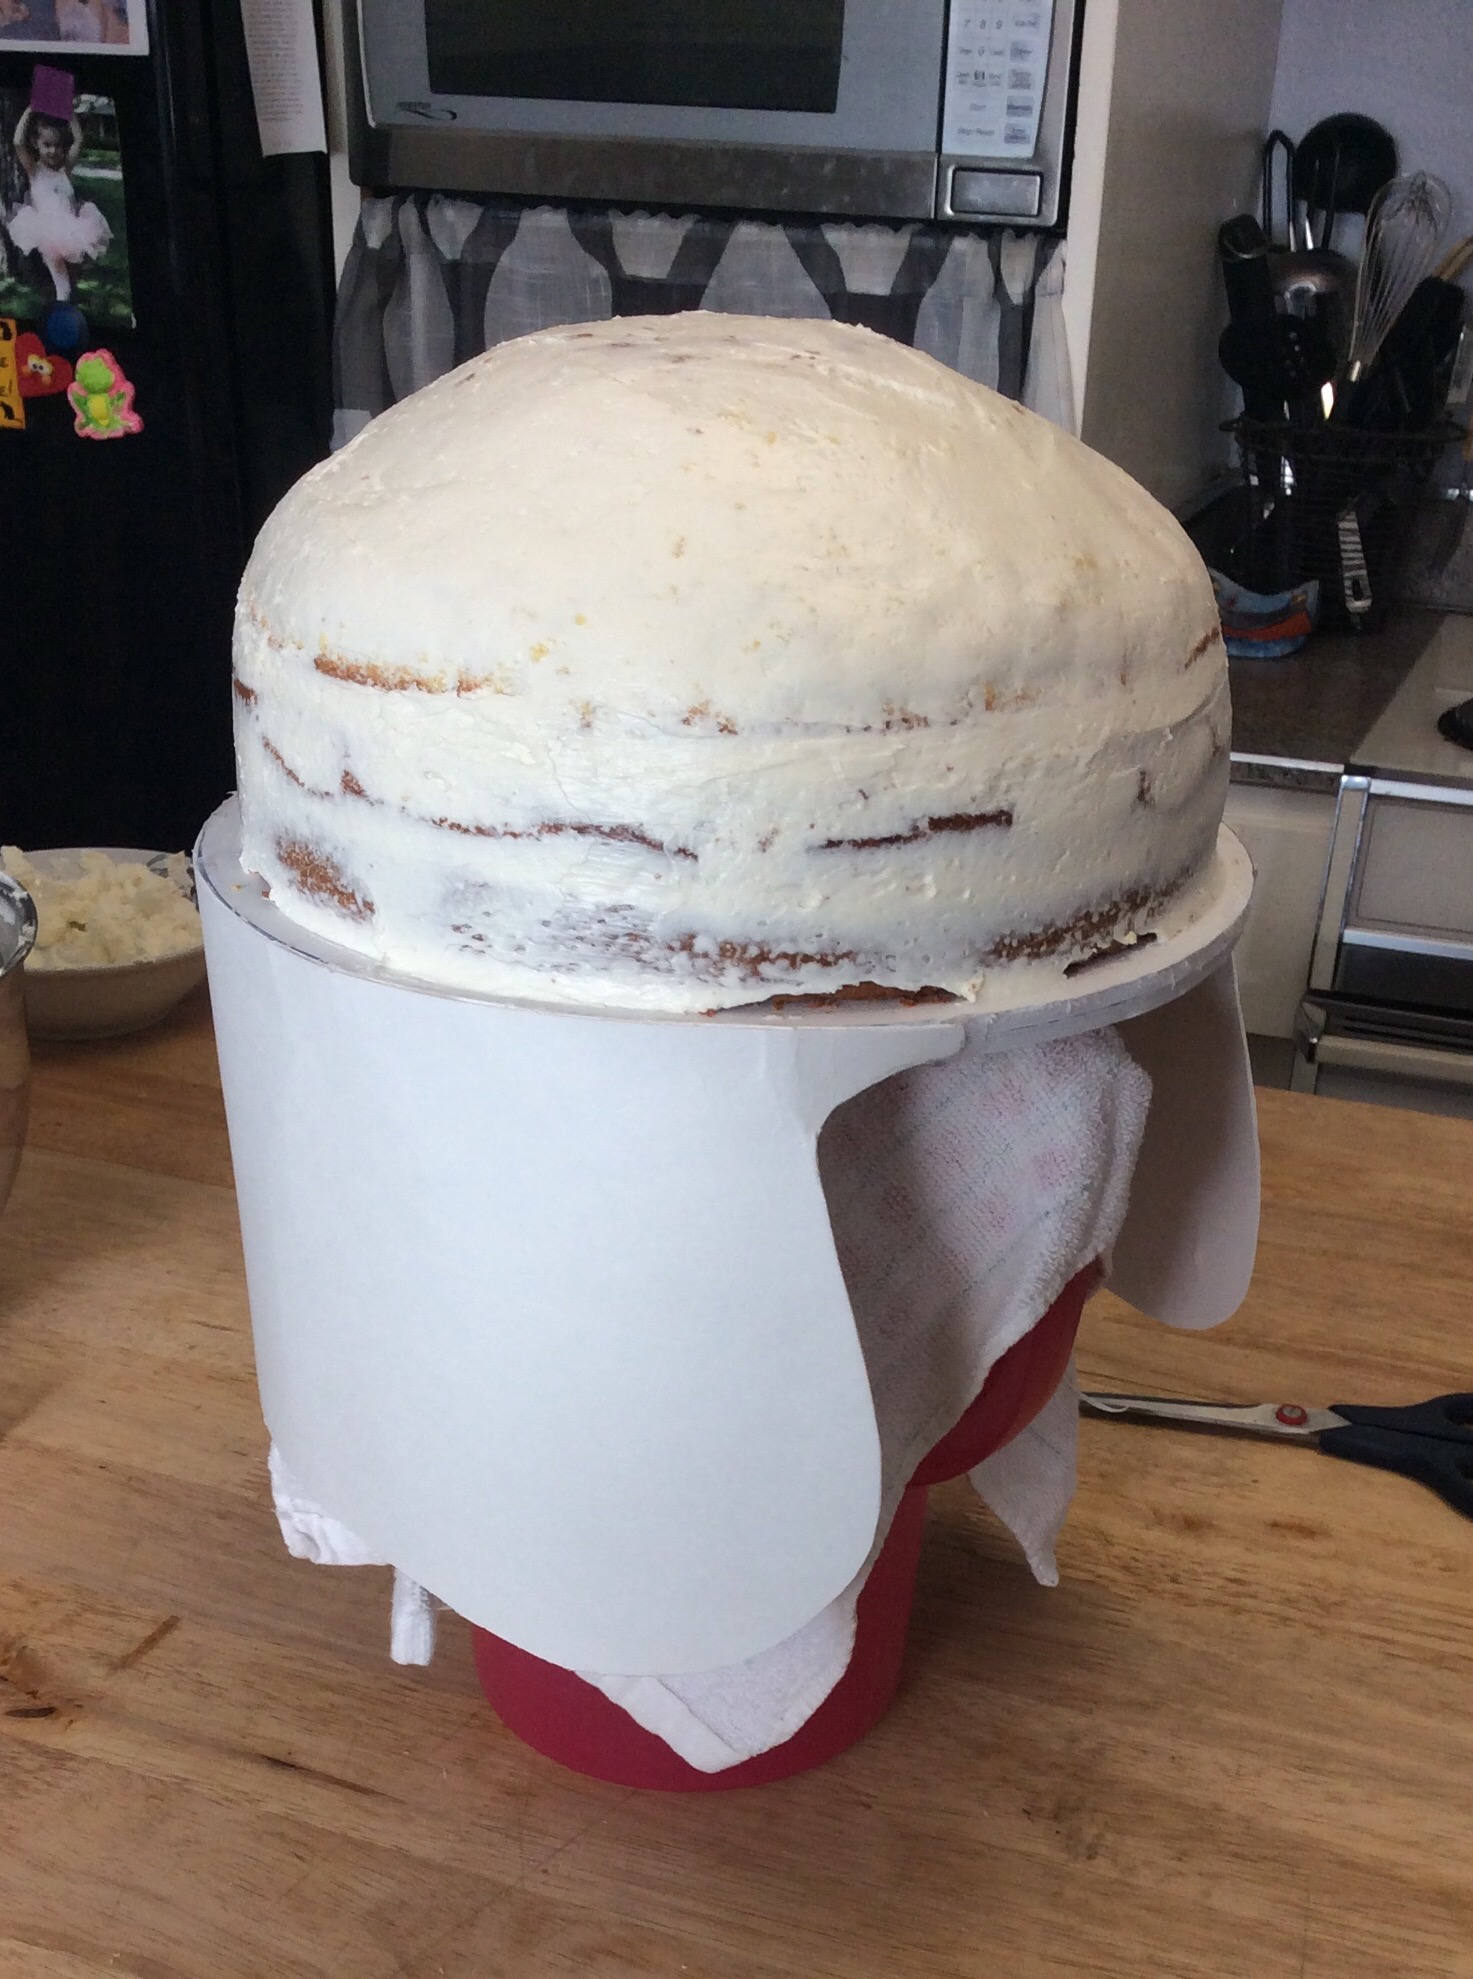

Because the lower portion of the helmet was poster board, I brushed it with piping gel so that the fondan would have something to adhere to…….while that works great, it also grabs and “glues” the fondant to the surface immediately. So the end result was a little more um…jacked up ……than I would’ve liked….. Lesson learned, next time just chill and wait until you have an extra set of hands available .

See? I know all you bakers can see those bumps…..ick, these are things that keep me up at night. Yet, time is not on my side here so I press on.
Once the helmet is done you’ll be able to measure your opening and carve the face out of your craft foam.

This is by far one of the more simple steps in the process. I used buttercream to lightly frost the foam, and then covered with fondant. You don’t want to add a lot of extra weight. Keep in mind you’re going to be attaching this to the front of your cake and it could potentially throw your bobble off….
Finally, the last thing I’d like to share with you is the actual attachment process. If you’re feeling lucky you could totally just set your helmet on top of the bobble mechanism and hope for the best. I chose the safer route…..heavy duty Velcro!
Once your helmet is placed though there’s virtually no going back without some serious repercussions so I recommend placing it once without the Velcro and marking the bottom of your cake base so that when you’re ready to attach it for good you know exactly where to set it.

And there you have it…..The Bobble Head Cake! I think he turned out just adorable.
Those darn Cakegirls think of everything! I’m just glad my lil brain retained what I had seen!
To watch him bobble visit my YouTube channel, Cakes by Sweetypants. Or you can see the video on my Facebook page!
